Windows SoftEther VPN Server
This post shows you how to use a Windows computer as a VPN server. This might be helpful in many scenarios. For example:
- Employees need to connect to a company LAN from outside the office
- You want to securely access the Internet from a coffee shop or airport
- You have a friend in a foreign country who needs unblocked access to the Internet
After you’ve followed along with this tutorial, you’ll have a working L2TP/IPsec server on your Windows computer.
Step 1. Open Firewall
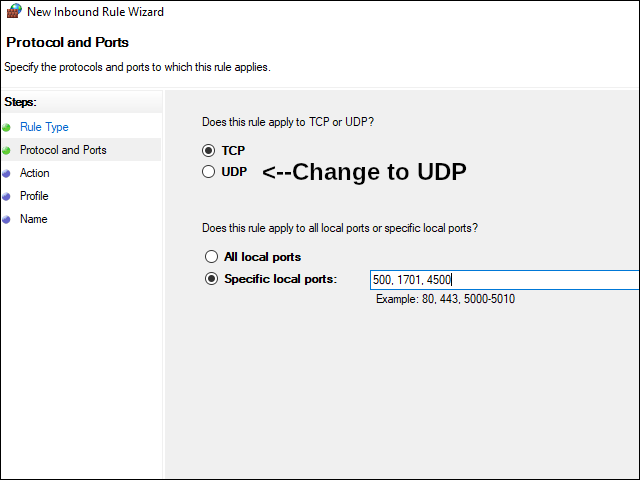
For traffic to reach an L2TP/IPsec server, you need to open ports 500/udp, 1701/udp, and 4500/udp in your computer’s firewall. On your Windows computer, you do that like this:
- In the Windows search box (next to the Start button), type
firewall - Select Windows Defender Firewall with Advanced Security
- In the left pane, click Inbound Rules
- In the Actions pane on the right, click New Rule…
- In the New Inbound Rule Wizard window, select Port, and click Next
- In the Protocol and Ports window, select UDP, and in the Specific local ports field, type
500, 1701, 4500and click Next - In the Action window, select Allow the connection, and click Next
- Check all profiles, and click Next
- Enter a Name such as
L2TP/IPsec, and click Finish - Close the Windows Defender Firewall with Advanced Security
In a typical home network, where you are behind a router, you also need to:
- Open ports 500/udp, 1701/udp, and 4500/udp for input
- Port forward these ports from your router to your PC
Instructions for doing the above vary from router to router. Consult your router documentation to learn how to do these steps on your particular make and model of router.
One more point about home PCs! You need a Power Plan that ensures your computer will not be asleep when clients try to connect. You can change the power settings on a Windows PC like this:
- Right-click on the Windows Start button, and select Settings
- Click System
- Select Power & sleep
- Change the settings for Sleep to Never
- When you’re done, close the Settings app.
Step 2. Download SoftEther VPN Server
Now for the download of the SoftEther VPN installer:
- Open a browser
- Visit https://www.softether.org
- Click Download
- Click Download SoftEther VPN
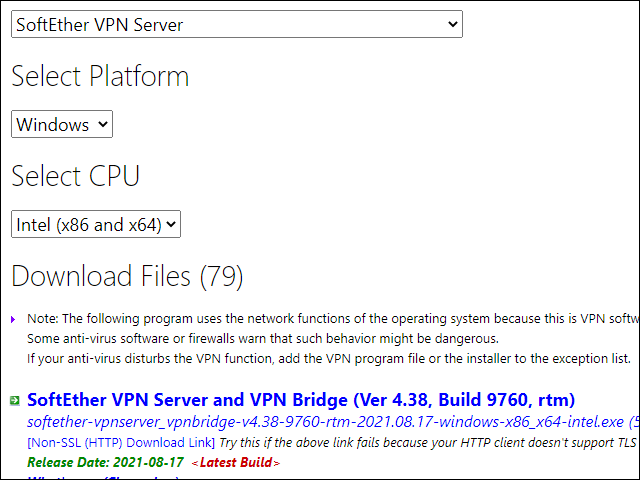
- Select SoftEther VPN (Freeware)
- Select Component SoftEther VPN Server
- Select Platform Windows
- Select CPU Intel (x86 and x64)
- Download the latest build
Step 3. Run the Installer
In your Downloads folder, find the Installer executable. It will have a name that looks like softether-vpnserver_vpnbridge-v4.38-9760-rtm-2021.08.17-windows-x86_x64-intel.
Run the installer executable.
- Read the initial information screen, then click Next
- If User Account Control pops up, click Yes to allow changes to your device
- Select software component SoftEther VPN Server, and click Next
- Read the End User License Agreement, check the box to agree to the End User License Agreement, and click Next
- Read the Important Notices, and click Next
- Accept the default directory,
C:\Program Files\SoftEther VPN Server, and click Next - On the Ready to Install screen, click Next
Wait while the installer runs. A SoftEther VPN Server Manager icon is created on your desktop. At the end of the installation, leave the box checked to immediately run SoftEther VPN Server Manager, and click Finish.

Step 4. Set the VPN Server Password
The SoftEther VPN Server Manager is started for you by the installer.
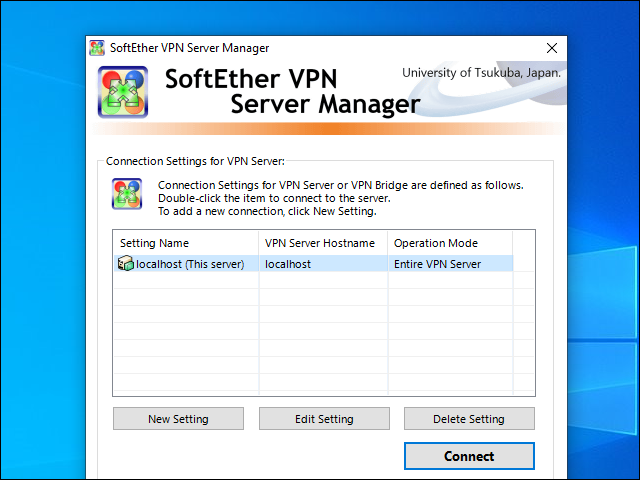
Leave the server localhost (This server) selected, then press the Connect button. The first time you do this, you will be prompted to enter and confirm a password for the server. Click OK when you’re done.
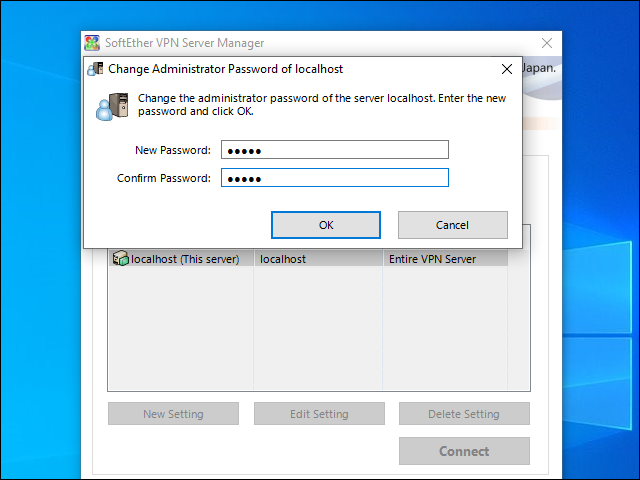
Click OK on seeing the password change confirmation box.
Step 5. SoftEther VPN Server Easy Setup
The first time into the server, a wizard walks you through the SoftEther VPN Server Easy Setup process.
Step 5a. Create Virtual Hub
Check the box for Remote Access VPN Server, and click Next.
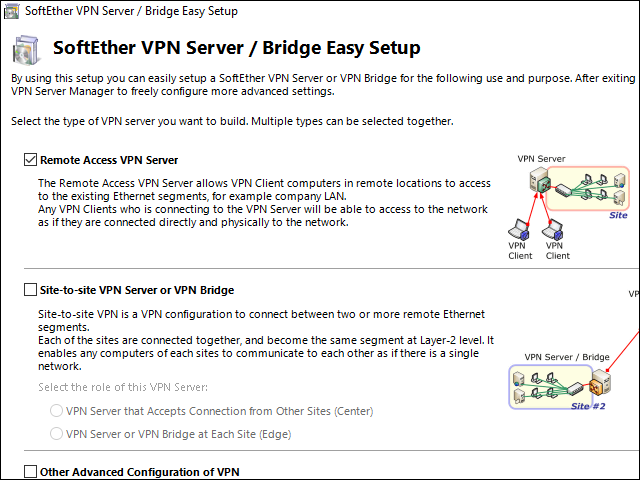
A message appears saying that the settings of this VPN Server will be initialized. The box asks if you really want to do this. Click Yes.
Give the Virtual Hub a Name, such as the default of VPN, and click OK.
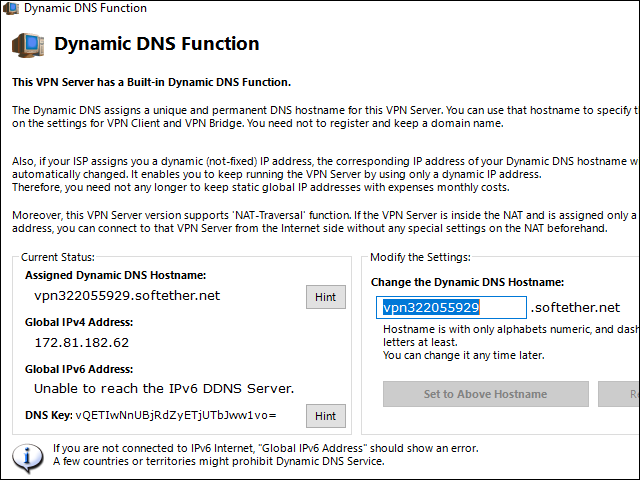
Step 5b. Dynamic DNS Function
SoftEther automatically assigns you a dynamic DNS name. It will look like vpn322055929.softether.net.
Click Exit.
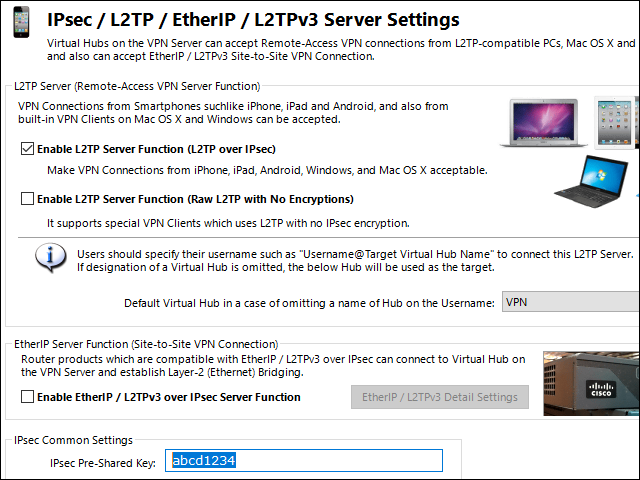
Step 5c. IPsec / L2TP / EtherIP/ L2TPv3 Server Settings
Check the box for Enable L2TP Server Function (L2TP over IPsec).
Enter a preshared key in the IPsec Pre-Shared Key box. It must be eight characters – for example, abcd1234.
Click OK.
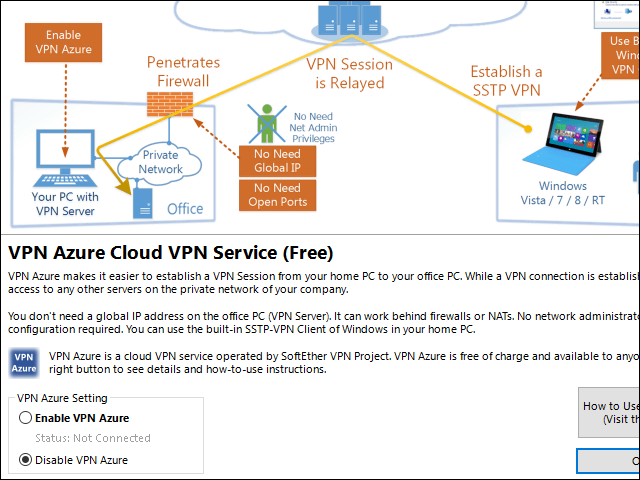
Step 5d. VPN Azure Service Settings
Select the radio button for Disable VPN Azure.
Click OK.
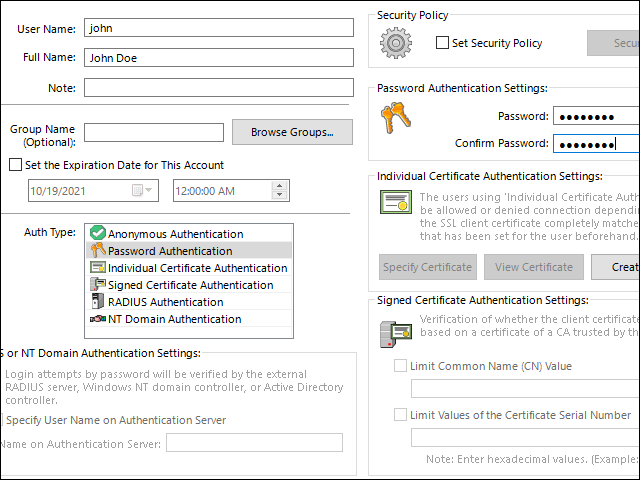
Step 5e. Create User
Click the button Create Users.
- Enter a username
- Enter the full name for this user
- Select Auth Type Password Authentication
- Enter and confirm the password
- Click OK
- When the confirmation box appears, click OK
- Since we need only one user for now, click Exit
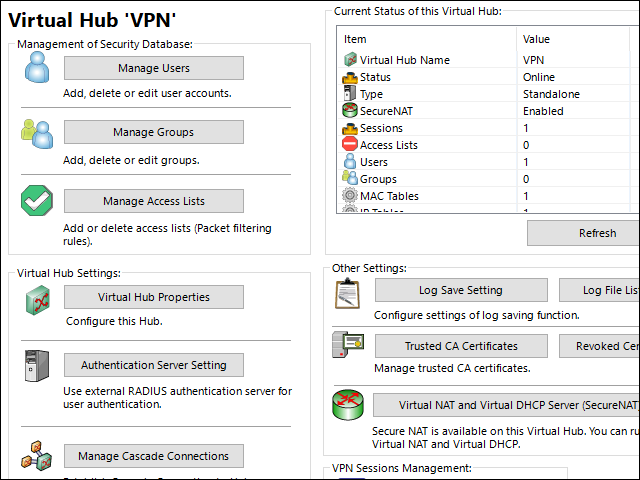
Stef 5f. Enable SecureNAT
SecureNAT function is an innovative proprietary technology developed for SoftEther that enables the creation of a more secure network. SecureNAT provides two functions: virtual NAT and virtual DHCP.
On the screen to manage the VPN server on localhost:
- Select the row for the default Virtual Hub, which we named just VPN
- Click Manage Virtual Hub
- Click Virtual NAT and Virtual DHCP Server (SecureNAT)
- Click Enable SecureNAT
- Click OK
- Click Exit
- Click Exit
You server work is done for now. Let’s test it with your first client.
Step 6. Install and Configure Client
An L2TP/IPsec client is built in to many devices. We will use a Windows client to test the server. The client PC must be a different PC, and at a different location, from the server PC.
On the client PC, in the Settings app, open the Network & Internet section. Select the VPN screen. Click Add VPN.
- For the VPN Provider, select Windows (built-in)
- Put a connection name of your choice, e.g.
New York - For server address, put the one assigned to your server, e.g.
vpn322055929.softether.net - For the VPN type, select L2TP/IPsec with pre-shared key
- For the Pre-shared key, type the one you specified on the server, e.g.
abcd1234 - For Type of sign-in info, select User name and password
- For the User name, type the one you set up on the server
- For the Password, type the one you set up on the server
- Check Remember my sign-in info
- Check Save

Step 7. Test Client to Server Connnection
On the row for the VPN connection you just added, click Connect. The status changes to Connected.
Open a browser, and visit https://whatismyipaddress.com.
You should see the IP address and location of your VPN server, not your client.
Congratulations!
You now have a working VPN server, ready to receive client connections.